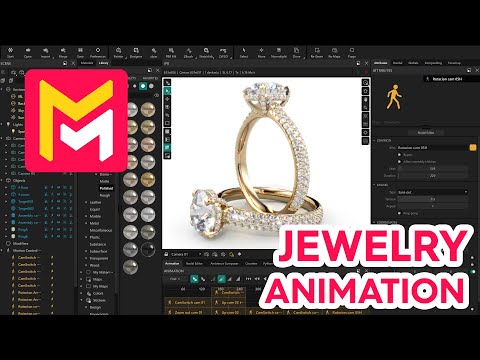
Jewelry
Summary
This text, a transcript excerpt from a "Maverick Render" YouTube video, describes the process of creating animated jewelry renders. It details how to configure scene animation, including setting resolution and positioning and animating cameras to capture different angles. The tutorial also explains how to add movement to the jewelry itself using motion controllers, animate depth of field for focus effects, and rotate the refraction environment to enhance the sparkle of diamonds. Finally, it touches upon using camera switching to transition between views and incorporating front plates for fade effects, before outlining the steps for a final render.
F.A.Q.
-
What is the initial setup process for a jewelry animation in Maverick Render? The initial setup involves changing the workspace layout to the animation layout for better efficiency. Then, you configure the render resolution in the render panel and select this resolution in the globals panel for it to take effect in the IPR (Interactive Preview Render).
-
How are cameras created and positioned for a jewelry animation? You start by creating a camera, often a front camera. In the camera properties, you adjust the focal length, typically to 60 for small objects like jewelry. You then adjust the camera's position in the IPR until you achieve the desired view. Once satisfied, you use the "create camera" button. Any unnecessary existing cameras should be deleted to keep the scene clean.
-
How is camera movement animated in Maverick Render? Camera movement is animated using a motion controller. You create a motion controller and drop it onto the desired camera. By stretching the motion controller on the timeline, you set its duration. Keyframes are used to define the camera's position at different points in time. For smoother movements, easing options like "easy out" can be applied. Target objects can also be used to control camera rotation and movement more precisely.
-
How can depth of field (DOF) be animated for a jewelry rendering? Animating depth of field adds a visually interesting effect, especially for jewelry. This is done by going to the camera properties at the first frame and setting an animation key on the focus parameter. You also need to uncheck the "disable global dof" option to see the blur effect. At a later frame, you set a new focus point, often on a key element like a diamond. Locking the exposure on the aperture parameter and increasing it can make the effect more subtle. Keyframes for the focus can be added using shortcuts.
-
How is the refraction environment animated to enhance the look of diamonds? Animating the refraction environment creates dynamic movement within diamonds. This is achieved by adding a keyframe on the refraction angle parameter at the first frame. Then, at the final frame, you set a new rotation value, for instance, 180 or 250 degrees. Scrubbing the timeline allows you to preview this effect.
-
How can you efficiently check the progress of your animation work? Creating quick animation previews is crucial for checking your work. Instead of rendering the full final animation, you can configure a "draft render" in the render panel. Draft renders have quality settings optimized for speed, allowing you to quickly see how the animation is progressing. You set the output path and render the desired frame range.
-
How are multiple camera views incorporated into a single animation timeline? To switch between different camera views within one animation, you use "cam switch" motion controllers. You create a motion controller for each camera and drop it onto its corresponding camera. You then adjust the position and duration of these cam switch controllers on the timeline. By setting the first frame and selecting the initial camera, scrubbing or playing the animation will automatically switch between the assigned cameras at the points defined by the cam switch controllers.
-
How are fade-in and fade-out effects achieved in the animation? Fade-in and fade-out effects can be added using "front plates". You create a front plate at the beginning of the animation and set its opacity to start black and gradually become transparent, revealing the animation. Front plates can also be placed between camera switches to create smooth transitions, potentially using the "ping pong" easing option.